
Witch hat cupcakes are a charming way to bring a little magic to any fall gathering or Halloween party. They’re deceptively simple, but the visual impact makes them a standout. I love how they turn a basic cupcake into a tiny, edible spell. Plus, they’re a fun project for kids or anyone who loves to decorate.
Why I Keep Making These Whimsical Wonders
They transform simple baking into a creative act, sparking joy and nostalgia. The playful design always gets giggles, and the rich cocoa flavor satisfies at the end of a busy day. Plus, decorating them feels like casting a little spell of happiness.
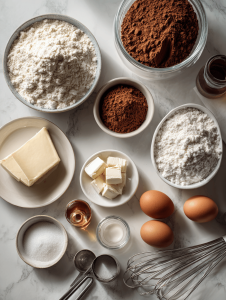
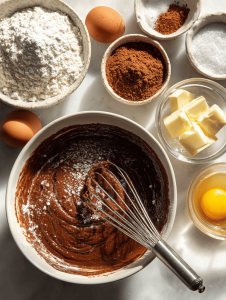
Breaking Down the Ingredients for Witch Hat Cupcakes
- All-purpose flour: Provides structure; skip if gluten-free flour is your preference.
- Cocoa powder: Gives rich chocolate flavor, a must for that dark, spooky look.
- Butter: Adds moisture and richness; substitute with margarine for dairy-free.
- Sugar: Sweetens and tenderizes; brown sugar can add a caramel note.
- Eggs: Bind ingredients; flax eggs work if you’re vegan.
- Buttermilk: Keeps the crumb tender; substitute with milk + lemon juice.
- Chocolate wafers or cookies: Shape the brim of the hat; opt for sturdy, thick cookies.
Tools of the Trade for Witch Hat Cupcakes
- Mixing bowls: For combining the batter and frosting.
- Electric mixer or whisk: To beat the ingredients smoothly and aerate the batter.
- Cupcake tin with liners: To shape and bake the cupcakes.
- Piping bags and tips: For decorating with frosting.
- Small cookie cutters or round cutters: To cut the chocolate wafers or cookies into brim shapes.
- Cooling rack: To cool the cupcakes evenly.
Step-by-Step for Witch Hat Cupcakes
Step 1: Preheat your oven to 180°C (350°F).
Step 2: Line a cupcake tin with paper liners.
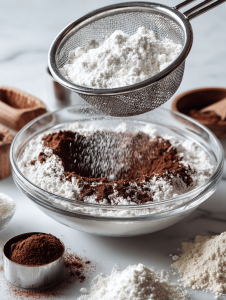
Step 3: In a bowl, mix the dry ingredients: flour, cocoa powder, baking powder, and salt.
Step 4: In another bowl, whisk together the wet ingredients: butter, sugar, eggs, vanilla, and buttermilk.
Step 5: Combine wet and dry ingredients gently, just until smooth.
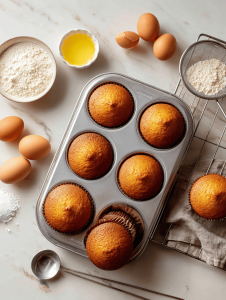
Step 6: Fill cupcake liners about 2/3 full with batter.
Step 7: Bake for 18-20 minutes, until a toothpick comes out clean.
Step 8: Let cupcakes cool in the tin for 5 minutes, then transfer to a wire rack.
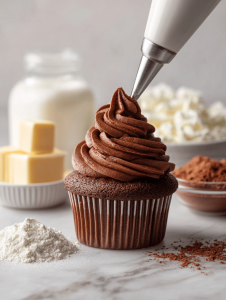
Step 9: Once cool, frost with your favorite chocolate or vanilla frosting.
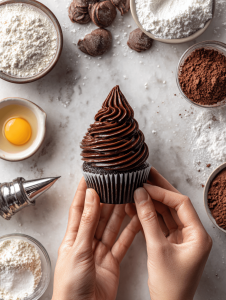
Step 10: Use chocolate wafers or cookies for the hat brims, and swirls of frosting for the ribbons.
Tips and Tricks for Perfect Witch Hat Cupcakes
- Ensure cupcakes are completely cooled before decorating to prevent melting the frosting.
- Use a chilled piping bag for cleaner, more precise frosting swirls.
- Check the consistency of your frosting—if too soft, refrigerate for 10 minutes before piping.
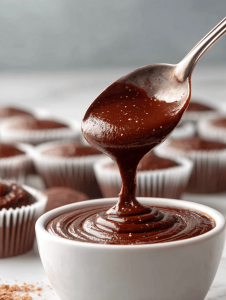
- For a more dramatic hat, use a thicker chocolate frosting or ganache.
Common Mistakes and How to Fix Them
- Frosting becomes runny in warm room.? FROSTING MELTING—Chill the frosting before piping.
- Too much batter making cupcakes collapse.? CUPCAKES SINKING—Don’t overfill the batter; it causes sinking.
- Decorations slide off or break.? HATS FALLING APART—Use a thicker ganache or frosting for stability.
- Cupcakes under or over-bake.? OVEN TEMPERATURE ERRORS—Use an oven thermometer for accuracy.
Witch Hat Cupcakes
Ingredients
Equipment
Method
- Preheat your oven to 180°C (350°F) and line your cupcake tin with paper liners. Gather all your ingredients so they're ready to go.
- In a large bowl, sift together the flour, cocoa powder, baking powder, and salt. This ensures a smooth, well-mixed dry base for your cupcakes.
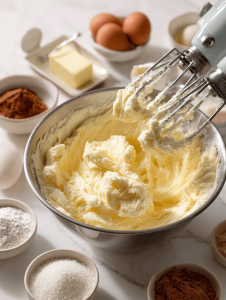
- In a separate bowl, beat the softened butter and sugar together until the mixture is light, fluffy, and smells slightly sweet, about 2-3 minutes.
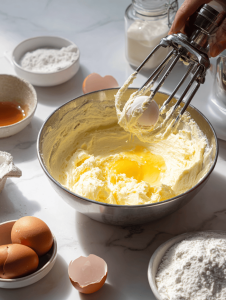
- Add eggs one at a time to the butter mixture, beating well after each addition. Then stir in vanilla extract until combined.
- Alternately add the dry ingredients and buttermilk to the wet mixture, beginning and ending with the dry, mixing gently after each addition until just combined. The batter will be thick and smooth.
- Using a spoon or scoop, fill the cupcake liners about two-thirds full with batter. Place in the oven and bake for 18-20 minutes, until a toothpick inserted into the center comes out clean.
- Remove cupcakes from the oven and let them cool in the tin for 5 minutes before transferring to a wire rack. Allow them to cool completely, about 30 minutes, to prevent frosting from melting.
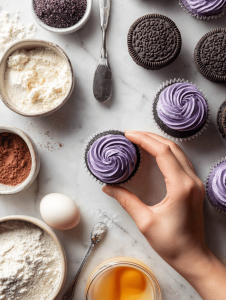
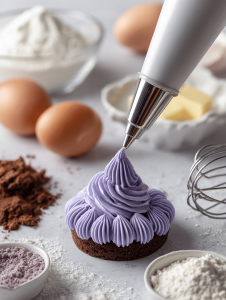
- Once cooled, spread a generous swirl of chocolate or vanilla frosting on each cupcake using a piping bag fitted with your favorite tip.
- Cut each chocolate wafer or cookie into a small brim shape with a cookie cutter or round cutter.
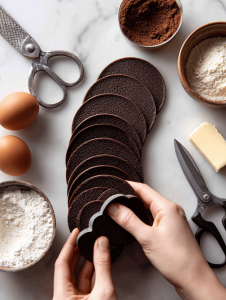
- Place the cookie brim on top of the frosted cupcake to resemble the brim of a witch hat.
- Finish decorating by piping small frosting ribbons or swirls around the cookie brim to mimic the hat's band or ribbon for an extra whimsical touch.
- Enjoy your charming witch hat cupcakes! They’re perfect for any Halloween gathering or fall celebration, offering both a delightful appearance and rich chocolate flavor.
Notes

Hi, I’m Daniel Whitaker, the voice behind Micromanaging Flavor. For me, micromanaging flavor is not about perfectionism. It is about paying attention. It is about understanding the small adjustments that turn a good dish into a great one. This blog is my space to explore those details and share what I learn along the way.
