Achieving that perfect gooey center in a chocolate fondant is like catching a fleeting moment of magic in the kitchen. It’s not just about melting chocolate; it’s about timing, temperature, and that delicate wait before you cut into it and reveal that luscious, molten core.
This recipe has taught me patience—watching the edges set just enough while the middle stays soft and fragrant with cocoa. It’s a quiet, almost meditative process, but the reward is worth every second of that careful watch. When done right, it’s a small, intense pleasure that makes everyone feel like they’ve been let in on a secret.
There’s something deeply satisfying about mastering this technique. It’s a reminder that sometimes, the simplest ingredients—good chocolate, eggs, butter—can create a moment of pure indulgence. It’s a dessert that’s as much about the process as the final reveal, and I keep coming back to it for that reason.
Focusing on the secret technique of achieving the perfect gooey center, this recipe explores the delicate balance of timing and temperature that makes a chocolate fondant truly exceptional. It’s about the quiet patience in the kitchen and the thrill of that first cut revealing molten chocolate.
The art of molten chocolate
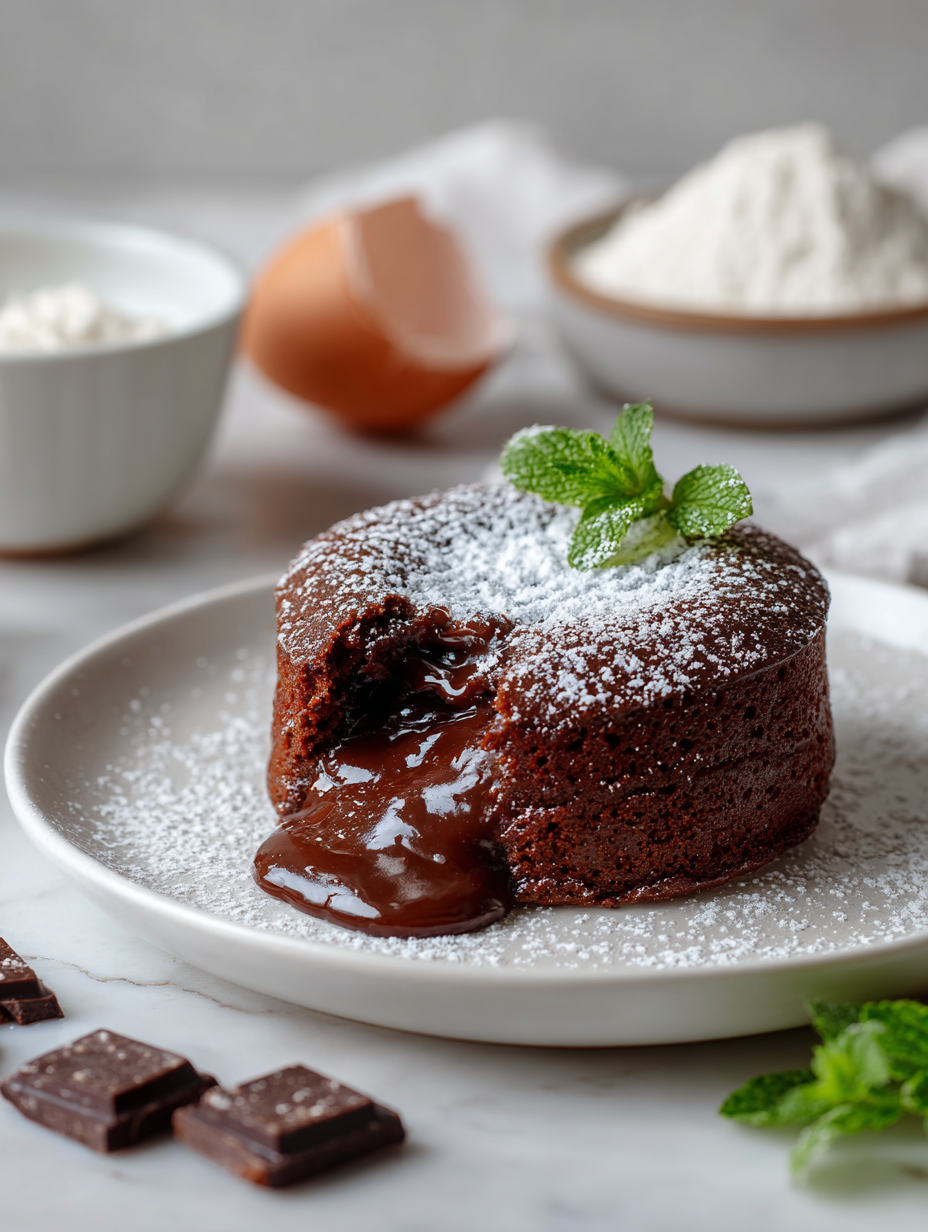
- Watching the molten centers ooze out when I cut into a fondant still makes my heart race, like a secret small victory.
- There’s a nostalgic thrill in seeing guests’ faces light up with that rich, chocolatey aroma filling the room.
- Sometimes, I feel a bit chaotic trying to time the baking perfectly, but that imperfect, slightly cracked exterior still tastes divine.
- Pride swells when I manage to get that glossy, crackly top just right, a tiny but mighty achievement.
- Relief washes over me when I see the fondant’s soft, jiggly middle after pulling it from the oven, knowing I nailed the timing.
The story behind this recipe
- My love for chocolate fondant started after a messy attempt at making a layered cake. I wanted that elusive gooey center, and somehow, I kept missing it. One night, I stayed up experimenting, adjusting baking times and oven temps, until I finally cracked the code. Now, it’s become my go-to for those special, quiet moments in the kitchen.
- There’s something about that moment when you cut into it and the molten chocolate flows out. It’s like catching a tiny, perfect secret. I remember serving it to friends and watching their faces light up—like I’d handed over a piece of magic. That feeling of pulling it off, even after all the tries, keeps me coming back to this recipe.
- heading: ‘The art of molten chocolate’
Chocolate Fondant Trivia
- Chocolate fondant, also known as molten lava cake, originated in France in the 1980s and quickly gained worldwide popularity.
- The name ‘fondant’ refers to the soft, melting center that contrasts with the firm exterior, showcasing a play of textures.
- Early recipes were often experimented with by pastry chefs aiming to perfect the timing for a molten core, leading to various regional variations.
- Some believe the dish was inspired by classic soufflés and soufflé-like desserts, but with a more indulgent, chocolatey twist.
- Modern techniques include sous-vide cooking and precise temperature control to achieve a consistently gooey center.
Ingredient breakdown: key components
- High-quality dark chocolate: I use 70% cacao because it melts smoothly and has that deep, bittersweet punch. Swap for semi-sweet if you prefer milder, but don’t go below 60%; it changes the richness.
- Unsalted butter: I like European-style for its creaminess, which helps the fondant set just right. If you only have regular butter, add a tiny pinch of salt to balance the sweetness and enhance the chocolate flavor.
- Eggs: Large eggs are key—they provide structure and help achieve that tender, gooey center. For a richer texture, I sometimes add an extra yolk, but keep in mind, it might affect the bake time slightly.
- Sugar: Granulated white sugar is my go-to for crisp tops; if you want a softer crust, a touch of brown sugar can add caramel notes. Be mindful that too much sugar can make the fondant crack or dry out.
- Flour: Just a tablespoon of all-purpose flour stabilizes the batter without dulling the chocolate intensity. Skip it if you want an ultra-liquid center, but it might affect the shape after baking.
- Cocoa powder: I sift in a teaspoon to intensify the chocolate flavor and improve the batter’s smoothness. Use Dutch-processed for a richer, less acidic taste, but natural cocoa works fine too.
- Optional: a splash of espresso or coffee enhances the chocolate’s depth—just a teaspoon, but it makes the flavor pop with a smoky, earthy brightness.
Spotlight on key ingredients
Dark Chocolate:
- High-quality dark chocolate: I love 70% cacao for a rich, smooth melt and deep flavor. Skip lower cocoa content for less intensity.
- Chocolate’s behaviour during melting: It becomes silky and glossy, crucial for that luscious, molten interior. Use gentle heat to avoid seizing or burning.
Eggs:
- They provide structure and tender the center. When whipped just right, they give that delicate, gooey consistency that melts in your mouth.
- Eggs’ thermal reaction: As they heat, they thicken quickly but need careful timing to keep the center molten, not rubbery.
Notes for ingredient swaps
- High-quality dark chocolate: I prefer 70% cacao for that deep, bittersweet punch. Swap for semi-sweet if you want milder, but avoid below 60%; it dulls the richness.
- Unsalted butter: European-style butter melts smoothly and helps set the fondant just right. Use regular butter with a tiny pinch of salt if needed.
- Eggs: Large eggs give structure and that tender, gooey center. For extra richness, add an extra yolk, but watch out for slightly longer baking times.
- Sugar: Granulated white sugar keeps the top crisp; for a softer crust, try a bit of brown sugar—carmely notes, but too much can crack or dry out.
- Flour: Just a tablespoon stabilizes, but skip if you want an ultra-liquid center. It changes the shape after baking, so consider your texture preference.
- Cocoa powder: Sift in a teaspoon to boost flavor. Dutch-processed cocoa offers a richer, less acidic taste, but natural cocoa works fine too.
- Optional: a splash of espresso or coffee enhances the chocolate’s depth—just a teaspoon, but it adds a smoky, earthy brightness.
Equipment & Tools
- Ramekins: To bake individual portions evenly
- Double boiler or microwave: To gently melt chocolate and butter without burning
- Whisk: To mix eggs and sugar smoothly
- Sieve: To sift flour and cocoa powder for a smooth batter
- Baking tray: To hold ramekins during baking
- Knife: To loosen and invert the fondants for plating
Guide to Perfect Chocolate Fondant
- Preheat your oven to 200°C (390°F). Lightly butter four ramekins, then dust with cocoa powder; tap out excess. Set aside.
- Chop 200g high-quality dark chocolate into small pieces. Melt with 100g unsalted butter over a double boiler or in short bursts in the microwave, stirring until smooth and glossy. Let cool slightly.
- In a separate bowl, whisk 3 large eggs and 1 extra yolk (optional for richness) with 50g granulated sugar until well combined. Add a pinch of salt for balance.
- Gently fold the melted chocolate and butter into the egg mixture. Sift in 1 tablespoon of all-purpose flour and 1 teaspoon cocoa powder; fold carefully until just combined. The batter should be smooth, shiny, and pourable.
- Divide the batter evenly among the prepared ramekins. Smooth the tops with the back of a spoon.
- Bake in the preheated oven for 12-14 minutes. The edges should be set and slightly firm, but the center still jiggly when gently shaken. The top may crack slightly.
- Remove from oven and let sit for 1-2 minutes. Run a thin knife around the edges to loosen, then carefully invert onto serving plates. Rest for a minute before serving.
Allow the baked fondants to rest for 1-2 minutes. Carefully invert each ramekin onto a plate, letting the molten center ooze out. Serve immediately, perhaps with a dusting of powdered sugar or a dollop of whipped cream for contrast.
How to Know It’s Done
- Outer crust is firm and crackly, center jiggles slightly when shaken.
- A knife inserted into the center comes out with moist, molten chocolate.
- The top has a glossy sheen, with a slight crack when done.
Chocolate Fondant
Ingredients
Equipment
Method
- Chop the dark chocolate into small pieces and melt together with the butter over a double boiler or in short bursts in the microwave, stirring until glossy and smooth. Let it cool slightly.
- In a separate bowl, whisk the eggs and egg yolk with the sugar until the mixture is pale, thick, and slightly fluffy—about 2-3 minutes. This helps incorporate air for a tender crumb.
- Gently fold the cooled melted chocolate and butter into the egg mixture, combining them until smooth and shiny. Be careful not to deflate the eggs.
- Sift the flour and cocoa powder together and carefully fold them into the chocolate mixture, just until no streaks remain. The batter should be silky and pourable.
- Butter the ramekins thoroughly and dust with cocoa powder, tapping out the excess. Chill the ramekins in the freezer for 10 minutes to help maintain their shape during baking.
- Divide the batter evenly among the prepared ramekins, filling each about three-quarters full. Smooth the tops gently with the back of a spoon.
- Place the ramekins on a baking tray and bake in a preheated oven at 200°C (390°F) for 12-14 minutes. The edges will be firm, and the tops may crack slightly, while the centers remain jiggly.
- Remove the ramekins from the oven and let sit for 1-2 minutes. Carefully run a knife around the edges to loosen the sides.
- Invert each ramekin onto a serving plate and gently tap to release the fondant. The molten center should ooze out as you lift it.
- Serve immediately with a dusting of powdered sugar or a side of whipped cream for a perfect presentation and maximum molten indulgence.
Tips for Perfect Chocolate Fondant
- Use room temperature eggs for a smoother batter and more even rise.
- Melt chocolate and butter gently—double boiler or short microwave bursts—avoid seizing or burning.
- Chill the ramekins in the freezer for 10 minutes before filling—this helps keep the shape during baking.
- Check for doneness by gently shaking the ramekin—center should jiggle slightly but not be liquidy.
- Rest baked fondants for 1-2 minutes before inverting—this allows the molten center to settle just right.
- For a crack-free top, avoid overbaking—remove when edges are set and center still jiggles slightly.
- Serve immediately—molten centers start to cool and set quickly, losing that luscious flow.
Common mistakes and how to fix them
- TOO LOW TEMP: If fondant is undercooked, increase baking time slightly and check center jiggle.
- DUMPED CHOCOLATE: Use high-quality chocolate melted smoothly; seizing means heat was too high, lower temp.
- OVER-TORCHED: If the top cracks excessively, lower oven temperature or reduce baking time by a minute.
- INCONSISTENT TEXTURE: Ensure batter is fully combined to avoid pockets of flour or uneven melting.
Quick fixes and pantry swaps
- When fondant cracks, splash a little hot water on the surface and smooth with a spoon.
- If center is too firm, rescue with a 5-second microwave warm-up until molten again.
- Dumped chocolate seizes—fix by adding a teaspoon of warm cream and stirring until smooth.
- Over-torched? Shield with a damp cloth and lower oven temp for next batch.
- When in doubt, pantry swap: use dark cocoa powder instead of melted chocolate for a quick fix. Smell should shimmer with cocoa richness.
Prep, store, and reheat tips
- You can prepare the batter a day in advance; keep it covered in the fridge for up to 24 hours. It firms up slightly, but still melts beautifully when baked.
- Assemble the fondants in the ramekins and refrigerate for up to 4 hours before baking. The cold batter may need an extra minute in the oven to achieve perfect gooeyness.
- Store baked fondants in an airtight container in the fridge for up to 2 days. Reheat gently in a low-temperature oven or microwave, watching for the molten center to soften but not overcook.
- Reheating in the microwave: 15-20 seconds on medium power usually works; listen for a gentle crackle and look for the center to still be soft and oozy, not hot and firm.
- The flavors deepen slightly after a day or two in the fridge, but the texture of the molten core may diminish over time. Best enjoyed fresh or within 24 hours for maximum gooeyness.
Top questions about chocolate fondant
1. How do I get the perfect gooey center?
A gooey center is achieved by baking just enough so the edges set while the middle remains molten. Overbaking will make it firm all over, and underbaking can cause it to be too runny or collapse.
2. What kind of chocolate should I use?
Use high-quality dark chocolate with at least 70% cacao for a rich, smooth melt. Cheaper chocolates may seize or result in a dull, waxy texture.
3. How do I prevent the fondant from sticking?
Make sure your ramekins are well buttered and dusted with cocoa powder to prevent sticking. Chill them before filling to help maintain shape during baking.
4. How long should I bake it?
Bake for about 12-14 minutes in a 200°C (390°F) oven. The edges should be set and firm, but the center should jiggle slightly. Adjust time based on your oven’s quirks.
5. Why did my fondant crack or overbake?
If the top cracks excessively, reduce the baking time slightly or lower the oven temperature. For a runny center, remove when the edges are just set but the middle still jiggles.
6. How do I reheat without losing the molten center?
Serve immediately after inverting for the best molten effect. Reheat gently if needed, but be careful not to overdo it or the center will harden.
7. Can I make it in advance?
You can prepare the batter a day ahead, keep it covered in the fridge, and bake just before serving. The batter might need a minute or two extra to bake fully.
8. What if the center isn’t molten enough after baking?
If the molten center cools and becomes firm, microwave for 10-15 seconds, watching for the shine and slight jiggle to return.
9. Should my eggs be cold or room temperature?
Use room temperature eggs for a smooth, consistent batter. Cold eggs can cause the mixture to seize or not incorporate well, affecting the texture.
10. How do I know when it’s done?
When in doubt, check for doneness by gently shaking the ramekin—edges should be set, center should jiggle slightly, and the top glossy.
Mastering the delicate balance of timing and temperature in chocolate fondant is like capturing a fleeting secret. Each time you pull one from the oven, that moment of molten chocolate flowing out feels like a quiet victory, a reminder of the simple joys in the kitchen.
This dessert is more than just a treat; it’s a small ritual of patience and precision, and a chance to impress with something that looks fancy but is surprisingly straightforward. When that warm, oozing center hits your tongue, it’s a moment of pure, unfiltered indulgence that’s worth every bit of effort.

Hi, I’m Daniel Whitaker, the voice behind Micromanaging Flavor. For me, micromanaging flavor is not about perfectionism. It is about paying attention. It is about understanding the small adjustments that turn a good dish into a great one. This blog is my space to explore those details and share what I learn along the way.
